Sunday, 26 February 2017

A walk along the canal

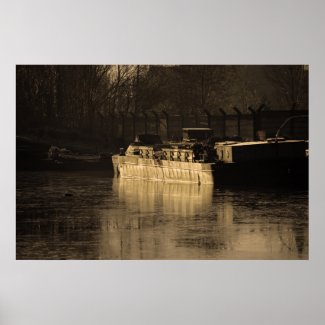
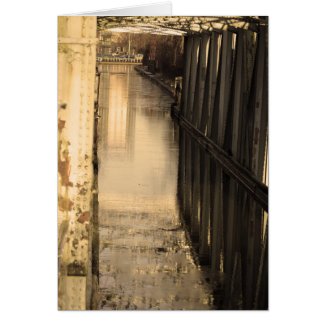
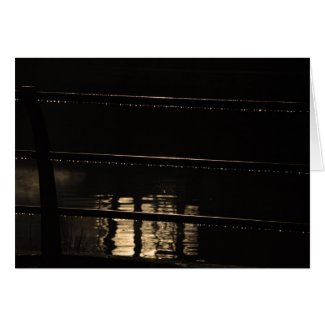
Railings and water drops card


Last Sunday I went for a walk along one of the canals that I live near. Usually if I have nothing planned for the day I will switch off my alarm and sleep till my body says it has had enough but with the days starting to get longer sunrise is getting earlier. So this time I let my alarm get me up and off I set too the starting point of my walk, being a Sunday and just after dawn there was not many people about.

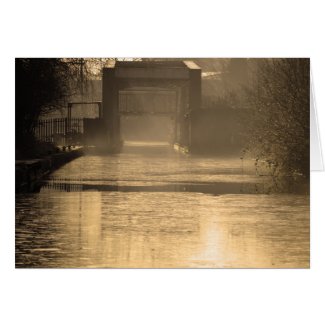
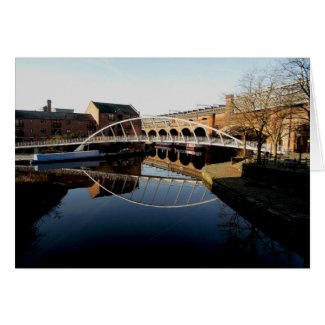
Bridge in morning sun and mist card


I walked along the Bridgewater Canal, starting at Barton Bridge and followed the canal through Trafford Park Industrial estate. Not the most promising of landscapes for photography but as with most places the character changes with the time of day and the weather.


Like many photographers I would love to travel the world to photograph great vistas that I see on the internet or in magazines but there are good images to be had much closer to home, you just need to look at them anew and maybe at different times of the day.

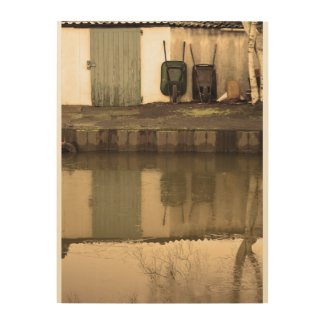
Door and Barrows Wood Print


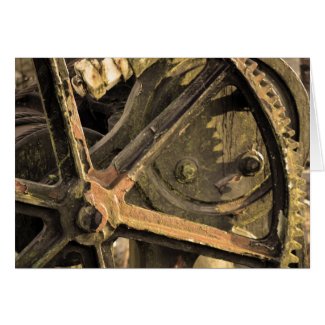
Forgotten Crane Card


and reflection Card" style="border:0;" />


Monday, 7 November 2016

Five Reasons Photographers should embrace Autumn

Five Reasons Photographers should embrace Autumn                


As winter approaches you may be tempted to store away your camera gear till the weather warms up again but before you do let me try and convince you other wise. I know that the days will be getting shorter and that on some days it seams that even the sun has not bothered to get out of bed, which is where you feel you belong.


There will be days when your efforts of capturing a great image will be completely washed out but with a bit of planning and an eye on the weather forecast let me give you five reasons to embrace the winter season.

1)      As the weather changes and the trees lose their leaves the mood of a landscape will completely change, sometime from day to day and defiantly from week to week. Pick a location or two within easy reach for you then go and photograph them each and every day even if it is raining or foggy, catch the frost and the first snow fall, then the snow again when everyone has walked in it. Before long you will have a collection of images that will show the changing mood of the location, you could extend this project to make it “A year in the life of” you could keep coming back to this location and make it “X down the years”, it is up to you how far you take it.
2)      Sunrise and sunsets. Sun rises have never been my thing, I mean in summer why would I want to get out of bed at that time of day when it is still dark to get to a location to photograph the sun rise? When in winter the sun rises at a more respectable hour. Believe it or not but the earth is at its closes point to the sun in its orbit in January but because of the tilt on the earths axis we have winter in the northern hemisphere and longer shadows. Dependent on your location on the planet the sunlight will have to pass through more atmosphere which will affect the colour of the light you and your camera will see. Another advantage of taking sunrise photos in winter is that you do not have to wait to long for the sunset. You travel to a location one time, photograph the sunrise, have your packed lunch the photograph the sunset.
3)      Car Lights. You know the ones that I am thinking about, the ones with the solid lines or red or white light cutting through the image. In summer for it to be dark enough you would have to take the image in the middle of the night when almost everyone including the traffic were in bed, then you would have to explain to the police why you are here at this time photographing their car. In winter you can take these image at a more reasonable hour of the day with lots of people (so safer) and traffic about you can have the images in your camera and be back home before your feet get cold.
4)      Holiday lights and store windows. Many towns and cities will put up Christmas or holiday lights which can be very photogenic in them self as well as adding character to the streets. In addition to this many stores will put up illuminated decorations and window displays which can be the subject of you photography on their own or with their surroundings. The lighting displays do not have to be the subject them selves, you could use the thousands of coloured lights to illuminate your subject, the people in the street or you could combine them to tell a story with people looking into the store window.
5)      Reflections. The wet weather that comes with winter means that you will have standing water all over the place so you will no longer tied to lakes, rivers and canals to get your fill of photographing reflections. It is not just standing water ether, wet roads and sidewalks will reflect the coloured lights from store displays and street lights. Familiar buildings can look fresh when photographed through reflections and you do not need mirror perfect puddles, try taking an image when it is still raining so that the puddle has ripples in it which will distort your subject giving it an abstract feel.


A few things to keep in mind before you start. You need to stay safe, dry and warm, so wear appropriate clothing and shoes / boots, now that it is dark out you need to be able to see and be seen so wear reflective clothing and have a light so that you can see where you are going and find things in your camera bag. Try it out before you go out, them gloves may keep your hands warm but can you change the setting on your camera with them on, the will not be much good if you have to keep taking them off. It is not just you that will feel the cold but your camera equipment as well, give your camera time to adjust to the temperature change both warm to cold and cold to warm. Batteries hate the cold so give them a good charge before you set off and keep your spare ones in an inside pocket so that your body heat will keep them warm.


Hope that you found this post useful, if so why not share it or leave a comment. If you have any tips your self for winter photography add them in the comments to let other know.


Monday, 26 September 2016

Print on demand sites POD


Print on demand sites or POD sites come in a verity of styles from free to paid sites and non customizable stores / galleries to fully customizable stores and galleries. In short they all do the same thing which is that they let you display your images which people can buy; they deal with the printing, shipping and payments (and refunds) and give you a percentage of the sale.

Visit a few POD sites to get the feel of them but keep in mind that the home page of the site can be very different to the individual photographer’s stores / galleries. First find images that are similar to yours, if there are a lot of images from lots of different photographers this is a good thing, it means that other photographers like the site and that people that buy images will be attracted to the site.


When you want to show people your images you can give them a link to your store / gallery, subsection or even an individual image and not the home page of the print on demand site. Because the print on demand sites are all about selling they give you lots of info and tools to help you market your images. Many of the print on demand sties have buttons next to your image that allow you or anyone else to post your image too social media sites like Facebook, twitter or Pinterest (this is a good thing). They also give you the script / code that will enable you to post your image into your blog or website which adds another level of security to your images. Most of the images on this blog are created this way and if you click on an image it will take you to the print on demand site that have additional levels of security.

Print on demand sites also differ in the products that they print upon, going from sites like Greeting Card Universe as the name suggests only produce greeting cards (in one size) to sites like Zazzle and Café press who produce a wide range of products. If your style of images seam popular on phone cases and mugs then why not let your customers buy your image in that format, after all not everyone has room in their home for a 50” x 40” framed print on the wall. It can also help improve your photography, you take a great image and think that it would make a nice Birthday greeting card but where would you put the Birthday massage on the image, so you take another image of the vista but this time you frame it so that you leave space for the massage. Now you have two images, one for a framed print and one for a greeting card. Developing this habit of shooting the same image in landscape and portrait as well as tight crop and with space to one side or all around will also help you with stock libraries.


Below are some print on demand sites that I will be taking a closer look at over the coming months, I hope that you find one you like.


The above list is by no means complete and many more can be found by searching for the phrase “print on demand”. Most of the sites have forums where many of your questions will have been answered in the past and can be found by a quick search of the forum, most forums on print on demand sites do not like you talking down about their site and do not like you talking about other print on demand sites one exception in Redbubble.


If you want to find out what people think about a print on demand site away from its mediators to can go to Facebook groups like Great gear or too forum sites like POD4you or warrior, all of which have tons of information. 


Thursday, 1 September 2016

Flickr

I said that I would tell you about where you could show your photography on the internet and the first place that comes to mind is flickr. After all it is most likely known as the original photo sharing website and as such you would think is your first port of call for getting your images noticed on the internet, well yes and no.

Should you have a flickr account, the answer is yes, it is a no brainier. Flickr is no longer the simple photo sharing site that it started out as but has evolved like any site has to stay in the public mind and photographers also have to evolve, no longer can you just post your images to flickr and expect recognition, no matter how good your images are. The fact is that you are more likely to be found by someone wanting to steel your images that you are to be found by someone wanting to buy your images but do not let that put you off this is the internet and there is a lot of scum about after all.

If you do not have a flickr account yet then get one, using the name that you want to be known as across all your other internet accounts, if you already have a flickr account then use that one, especially if you already have a number of followers or have had the account for some time and have a number of images uploaded.

It is had to draw attraction to your account unless you have images to look at but before you add any images, add them to a site where people can buy the image, whether that be as a wall print or a greeting card. When you have a place where people can go and buy your images then flickr is not just a place where you can show your images but it is a shop window that will help to bring in people too your store to buy your images. Where ever you have your images for sale, that site will have information on creating links too the sales page for that image, so that when you add a photo to flickr, in the description you put the link to where people can buy your image.

On flickr you can create different portfolios or sections, so that when someone arrives at your main page they can see that you have images on: landscape, close up, Wedding, flowers, B&W, urban and so on. Even T shirts, greeting cards and Christmas gifts. Putting your images into different sections helps people find what they are looking for and it will also help you market your different images. So on your social media account instead of just posting too your flickr account you can post too your landscape images or your flower images giving you a better response to your social media posts.

When adding images to flicker reduce the size and quality of the image, this will reduce the chances that someone will steel the image only upload the smallest images after all a lot of people looking at your photos will be doing son on mobile devices like a smart phone and if some likes the image they will follow the link to see it in a larger protected format. Putting your image on flickr with a link to where you can buy it also creates a back link that helps the search engines find your work, which in turn helps a wider buying audience find your work.

Flickr is kinder of a social media site, which means that you follow people for people to follow you. Which makes flickr an enigma, because flickr is mostly photographers and on every other social media site photographers have a very bad reputation in that they will follow you and then stop following you after you have started to follow them. They may think that will give them some air of importance but is not very social. So who should you follow? Well people whose images you like, for a start but rather than just following accounts that have the same type of images that you have why not expand your self and have a look at styles and subjects that are unknown to you.

Another way to grow your following is to interact with other accounts / photographers, when you find an image that you like why not leave a comment. The photographer may then visit your page and leave a comment on one or more of your images, at the very lest you will now have a link for search engines to follow from their account too yours on Flickr. If they do not have a lot of followers then the person is more likely to leave a comment on your images but if they have lots of followers then it is better for the search engines.

You can take this a step further if they have a link to where they sell their images. Follow the link and you may find a new place to sell your images and if you are already a member then log in and leave another comment, this has the same effect as above but this time on a site where you both sell your work weather that be Zazzle, Smug mug or Redbubble. Another dimension to this is that every time they promote their work there will be promoting that link back to your work.


Next time I will be looking at one of the places that you can sell your work. 


Sunday, 17 July 2016

Where to show your images on the internet


Forgotten Bench


You spent weeks finding access to the perfect location, you’ve researched it and you got up in the middle of the night to get there and set up ready for the perfect time of day, yes the weather was not right the first two time but this time everything was right. Then you spent too many hours to count in postproduction, making sure the image was just right, till your vision was realised in the image before you. After all this effort don’t you think that the world should see your image?


Web and Water inSepia


There are many ways to put your images on the internet for other people to see them, both paid and free. Over the coming months I will look at some of them in more detail but for now it will just be a brief over view of some of them. As a rule of thumb the more control you want the more it will cost you ether in time, skills or money.


Website:
Having your own website may seam like the obvious option and indeed they can be a great asset. Though they can be a little static and search engines like new content all the time. How much control over the look of your website will depend on your programming skills and how much money you want to pay?

Blogs:
This may be the first place that you think of placing your images and I would recommend that you have your own blog even if you have your images elsewhere, so that you can have a central point on the internet that links to all your other internet galleries. If you are short on time this will give you one place for you to market that will link to all your images on the internet. Wordpress.com or Bloger.com or Tumblr.com are a good place to start.

Photo Galleries:
Photo galleries have the advantage of being known for their images which means that people looking for photos will know what to expect when they go to the site. They range from Flickr that is free and popular to paid for hosting at sites like 500px

POD Print on Demand:
POD sites are sites that let you sell your images on products and you get a percentage of the sale. Some sites let you add your images for free while others will charge you every month even if you do not you make any sales. Some sites like Zazzle will let you add sections / galleries while others like Redbubble will put all your images in one store / gallery.


Trees and Snow

Of course as in everything there are advantages and disadvantages to each of the above methods, indeed even within each method above there are advantages and disadvantages between each company involved in each method. First off you need to decided what you want from your exposure on the internet and of course this may change over time but what do you need now? This will help you know if a particular method / sites advantage is an advantage for you, even to pay for and if the disadvantages of a particular method / site is in deed a disadvantage for you.


Saturday, 9 July 2016

Understanding Exposure.

Set the shutter speed to the ASA film rating (100 ASA = 1/100th second) and the aperture to f8 for bright sunny days. This was the rule of thumb exposure settings that you use to get with rolls of film back when many cameras did not have an internal light exposure meter built in.

This might seam like a bit archaic by todays standards but let me explain, many people take images in RAW format thinking that you can recover and correct any mistakes made in camera when processing the RAW file. Sure you can recover some detail while processing the RAW file just like you could with film by changing the developing times but the key word here is SOME.

Of all the aspects of photography, exposure is the one you need to understand and get right, it is the foundation of the rest of your photography. Yes you could leave you camera set on auto but you would be missing out on some great tools to influence your photography. A great book to help you get started is Bryan Peterson’s Understanding Exposure.


Understanding Exposure, Fourth Edition: How to Shoot Great Photographs with Any Camera


This newly revised edition of Bryan Peterson's most popular book demystifies the complex concepts of exposure in photography, allowing readers to capture the images they want. 

Understanding Exposure has taught generations of photographers how to shoot the images they want by demystifying the complex concepts of exposure in photography. In this newly updated edition, veteran photographer Bryan Peterson explains the fundamentals of light, aperture, and shutter speed and how they interact with and influence one another. With an emphasis on finding the right exposure even in tricky situations, Understanding Exposureshows you how to get (or lose) sharpness and contrast in images, freeze action, and take the best meter readings, while also exploring filters, flash, and light. With all new images, as well as an expanded section on flash, tips for using colored gels, and advice on shooting star trails, this revised edition will clarify exposure for photographers of all levels.


Thursday, 7 July 2016

I am back again

 For what seams like forever my home has been in the upheaval of renovation and I have been living out of boxes but now I am back. I do not normally talk about what kit I use as a lot of people that I have encountered tend to be equipment and brand junkies rather than photographers.

I am not rich so when it comes to choosing equipment the over riding factor is my wallet and what I can afford at the time as well as the subject matter that I will take photos of. Over the years I have used many different cameras from compacts to medium format, I have even sold images taken on my smart phone, each camera has its pros and cons but it comes down to personal choice but more importantly are you happy enough to take the camera out with you at every opportunity so that you are ready to take that all important photo.

Well my latest kit is a Nikon D3200 with an 18-55 and a 55-200 kit lenses. It feels quite a bit smaller than my Cannon 5D and 6D and I am hoping that this will make it easer to carry around. Now that I have got that out of the way lets get on with the subject of photography.

I try to carry my camera as often as I can so that I do not miss out on a photo opportunity, other time I am out and about just hoping that inspiration comes too me, both methods are not very productive and I am just lucky if I get any photos to keep. I do have a back up plan that is growing my catalogue of close up of interesting textures that I can use in other projects but some times this is all that I come back with.

Having had such a long spell from photography I intend to make the most of this camera and my time, looking at other images for inspiration is great but if I wanted to take images of the Northern Lights then I would have to book a flight and wait around for about seven months, not very good for productivity.

Projects: Is the way to go from short one day projects for when the weather is not that good and open ended projects that I can pick up on when I do not have anything else filling my photography time.

One Day Projects

Still life:
These are great for when the weather is overcast; in fact this helps as the clouds act as one big diffuser when lighting your subject with natural light. Stuck for subjects why not raid the kitchen or garden shed for utensils and tools arranging them together or on their own. Be sure to work all the angles and as well as taking images that show the whole subject move in and isolate parts of the subject giving you an almost abstract image.

Food Photography:
Planning a special meal or just papering your self, then why not document your progress as well as the finished result. This could be part of a bigger project by getting the images for that cook book you have always been meaning to write.

Back catalogue:
It is a great feeling creating the image but what are you going to do with it now, just leave it on your computers hard drive. Why not post it on the internet on sites like Flicker or 500PX you could even offer it for sale on sites line Zazzle or Redbubble.

Open Ended Projects:

Taking the Same Photo:
Some places character changes dramatically as the seasons change, why not revisit them through the year and capture that change. Other places change over a much longer period with new buildings and renovations, so if you hear of such a project in your local area big or small get out get some images before it all changes. Do not forget to go back when the work has finished and who knows over the years you could build up a body of work that is of important social documentary, there might even be a book in it.

Post Cards:
Many places have post cards of their surroundings be it cities, towns, villages and even individual buildings. Why not have a go at recreating some of them but with a twist. Some times it is impossible to find the vantage point that the original post card was taken from and the weather is sure to be different so use a different vantage point and go for inclement weather to give a totally different mood to the post card. When you have your collection on new postcards why not publish them.

A year in the life of your pet:
Some pets will play for the camera more than others giving greater photo opportunities, you know your pet better than anyone else so you will be better able to capture their personality. You can take the images every day or every couple of weeks, it is up to you. Have a product in mind for the end of the project, like a photo album or photo book to help keeping the project going.


Friday, 10 February 2012

Thinking outside of the picture frame

Many photographers long for their images to be seen by a wider public, beyond their family and their fellow members at the local camera club. Some photographers do enter competitions or send their images off to dedicated photography magazines, this is not a bad thing, but overall they are still only showing their images to the photographic community when their images could appeal to a much wider population.


Photographers spend lots of time both behind the camera and on the computer honing their skills to produce the best image they can, right down to the type of photographic paper the image is printed on and what type of matting and frame will best complement the image. Even on the internet, websites and galleries use design and imitation matting to best display the image all framed by the viewers monitor.


Even moving a little bit outside the ridged frame of wall art can get your images in front of a whole range of people that would otherwise have never seen your work. Producing calendars or greeting cards and your images will be viewed by all kinds of people that you would never imagined liking your work. Greeting cards with just an image and no verse do sell but you will have more luck if you add text to the front and a verse inside for a specific occasion, birthday, sympathy, wedding and holidays.


Pushing even further beyond the frames of wall art with a quick look at some of the bigger POD (print on demand) websites and you find that you can have your image on many different types of products. Before you click away, think of this as a marketing method. If you have an image that would work as a canvas print then why not as a “T” shirt or sweatshirt, just how many people will see your image as that person wearing it walks down the street? Go into a coffee shop and see how many smart phones / iphones are on the tables and how many people are using laptops, customized skins for both phones and computers are becoming more and more popular maybe you have seen them already and if so why should it not be your image on those skins.


Maybe you are not ready to jump into the global market but you would still like to put your images to use and let others see them. How about incorporating them into hand made greeting cards, the time and effort you put into making a card helps to display your sentiment. If you do not know where to start then why not look at Crafts U Print for tips, inspiration, and supplies.


Think outside of the picture frame and get your images out in the world for people to see and appreciate.


Follow Me on Pinterest

Tuesday, 11 October 2011

Photography Competitions

Competitions in any area can be useful to help you improve your skills and this is true of photography competitions. The hardest part is to get over your fear of having someone judge your work but the rewards are worth it. The biggest reword has to be an increase in your confidence, even if it gets a little bruised along the way. You can reduce the chances of getting you confidence knocked by carefully picking the competitions that you enter.

There are many competitions to choose form each with their own advantages and disadvantages. You could start off at your local camera club or library, while there may not be any prize money your only cost should be the printing and you should be able to get more in-depth feed back from the judges.

If you do not want to be in person, you could always use the internet. There are many good photography web sites, some linked with off line magazines that have regular competitions with quite a few offering equipment as prizes. If a competition winner is voted in by the members of the site then the winner will be the one with the biggest following on twitter / facebook. If people can leave comments on your entry, remember that there are some very sad people that like to hurt others while hiding in hyperspace.

Big money competitions that have prizes of five figures plus attract many people with a lot of talent and usually have quit a high entrance fee to keep the numbers down. If you are going to part with your hard-earned money, you should look out for a few things:

• Does the competition have a history, so that you can see what standards your will work have to be to have a chance of wining.
• Is the competition run by a reputable organization, so that you know that you will be paid?
• Make sure that you are not giving away your copyright if you win or even just for entering. Even well known and loved organizations run copyright grab competitions from time to time.
• What are your responsibilities if you win or are placed? You might have to print and frame your work to a set size and be there on the opening night to get your prize. Not a problem if it is in your home town or nearby city but what if it is half way around the world!

Local competitions come up all the time, it could be the local paper, government, company or even a local band and they are usually free to enter. Local photography competitions usually have goods or services as prizes but if it is worth your time and it is not a copyright grab then why not give it a go!

It is always best to take a fresh photo for a competition rather than dig one out of your files and if you feel that your technique needs a little help then you could read up a bit on it, I would recommend:

The Photographer’s Mind: creative thinking for better digital photos by Michael Freeman


Composition: From Snapshots to Great Shots by Laurie Excell


Disclosure: many of the links on this blog are affiliate links from which I receive some money, but if you use them, you get the added benefit of knowing that you are helping support a fellow photographer with their own camera collection addiction, thank you.


Follow Me on Pinterest

Thursday, 11 August 2011

Photographers and Equipment

Have you ever noticed that when you get a few photographers together a big part of the conversation is taken up with a discussion about equipment. Sure, you will get a few snippets about technique, subject, locations, humorous antidotes and if you are lucky individual images. Photographers love for camera equipment seams to affect us all too some degree, this “camera collection addiction” and it plays on our confidence; “I would be a better photographer with that new camera” I could get the image with that bigger lens” “how have I managed to live without that gadget”.


Before the camera manufactures gang together and shut down this blog, let me say that the advances in camera technology have been great (keep it up) and some photos you just cannot get without the right equipment but it has made us all lazy. Do not get me wrong, I love technology but I think that it is holding many photographers back from reaching their full photographic capability. There seams to be an attitude of “the camera will take care of that, if not I will fix it on the computer and if I can’t then just delete it, after all it did not cost me anything”, well it has cost you your time and a little bit of your enjoyment of photography.


Photography is a great past time that gives vast rewards and like any endeavour the harder challenging the greater the reward. Like many endeavours, photography challenges you on many levels from learning about composition to the working and handling of your equipment, and carrying it all around. To start off, how well do you know your own equipment? When was the last time (if ever) you read the users manual for your camera or equipment, if you are not sure how a particular feature would benefit you then why not executively use that feature for a few days till you know it inside out and what it can do for you.


Probably the best way to increase your enjoyment of photography is to be forever expanding your boundaries and improving your skills, that also includes pushing your equipment to its limits. If you know that a particular lens has coped well in poor lighting then next time you are in a similar situation you will have confidence in your lens leaving you to concentrate on the image that your are creating. So next time you see a wonderful image why not push your equipment to its limit to produce an image as good if not better.


Disclosure: many of the links on this blog are affiliate links from which I receive some money, but if you use them, you get the added benefit of knowing that you are helping support a fellow photographer with their own camera collection addiction, thank you.


Follow Me on Pinterest

Thursday, 28 April 2011

Taking Photos on your Vacation

If you are like me then you are already counting to days until you can leave your job behind and head off to the sun for two weeks. The thrill of having new surroundings and photo opportunities every which way I turn, the only down side is that I know that I will not be able to take all my photography equipment with me as it is a family vacation and not a photography trip.


To help you decided what camera equipment you should take with you on your vacation you could research what photo opportunities there are at your destination. Have a look at the holiday brochures from the travel agents and check out the local bookstore. The more images the better, not only will this help in your equipment selection but you will also see how other photographers have tackled the subject.


The internet is also a very good place to find images of the place you are going to on vacation, just type your destination and the word ‘photo’ into your search engine. If you are looking to make some money from your vacation photos then have a look at photo stock site Fotolia" or macro photo stock site Shutterstock " this will also show you the type of images that sell.


I would strongly recommend that you do not take any equipment with you on your vacation that you do not fully understand how to use, the last thing you want to be doing is reading the users manual rather than relaxing at the bar / pool. That would also go for any photo technique that you might want to try, better to do that at home rather than getting frustrated on your vacation. With that in mind why not fresh up on all your photography techniques before you go, two great books for that are Life Guide to digital photography by Jim McNally and Betterphoto Basics by Jim Miotke.


One last thing, remember it is your vacation and you are there to relax and have fun.


Friday, 4 March 2011

The Next Level

In my last few posts, I have written about the technicalities or the basic rules of photography, composition, lead lines and so on. Now I would like to take the next step and try to write about what makes a good photo good. This is impossible, for a number of reasons, we all see, colour in different ways and we all like different types of images, with that in mind the main person that you have to please with your images is your self.

This is a very simple concept; create images that you like, even passionate about. This will add quality to an image that everyone will see even if they do not know why, your passion and knowledge of a subject will show in your image. Many artists of all types when starting out crave appreciation or approval and they only start to advance their art when they stop trying to please other people.

Choosing not to follow the rules of composition is not the same as not knowing about composition, yes you may get lucky but most likely you will not. The same is true about finding images that you like, you could take thousands upon thousands of photos and you may get lucky, another way would be to learn how to read an image and then look at the images of photographers that are passionate about their work. Do not just limit your self to photographers but look at all types of artists work, see if they have followed the rules of composition or have they broken the rules and if so does it work for you.

The more you look at different artists work the more ideas you will have for your own work, do not copy other peoples work to pass off as your own. What you are aiming for is to take your first steps to building your own style, do you want people to look at your image and say that it is in the style of or a copy of some famous photographer or would you like them to say that it is your image and that you are the famous photographer. that is what building your own style is all about.

If you would like to know more about taking your photography to the next level then why not have a look at George Barr’s book ‘Take your photography to the next level’ as he is a much better writer and photographer than I am.


Sunday, 27 February 2011

Depth of field (DOF)

Depth of field is the term for how much will be in focus, sharp or blurry in a photo.
Many people like to have everything in focus in a photograph; this is down to personal preference and subject matter. Zooming in or out lets you chose how much surroundings to the left and right you include with your subject, depth of field lets you chose how much surroundings you keep (in focus) in front and behind the subject.


First off, there is no right or wrong, it is you photo and it is up to you how much you have in focus or not. If you are photographing a beautiful landscape you might want everything in focus from your feet too the horizon but if you are photographing a person in a busy street you might want just that person and not all the other people so that the viewer of the photo knows who the subject is.


So how do you control the depth of field? Well, by using the f-numbers or f-stops, these numbers let you know what the aperture is set at. The aperture is a hole in the lens that opens and closes a bit like the iris in your eye, the bigger the f-number the smaller the hole which gives you more DOF, the smaller the f-number the bigger the hole which gives you less DOF. So big f-number = big DOF and small f-number = small DOF.


As the aperture opens and closes it will let more or less light through the lens, so with a large f-number you will get less light and so you will need a longer shutter speed, and the reverse is true of a small f-number.


It can be hard to see the effects of DOF on the display on the back of your camera, so until you know what results your camera will give you at what setting I would advise you to take a few photos at different f-number and you might come up with a great photo.


Photography is all about trying new ways of doing things and above all have fun.

Monday, 27 December 2010

Christmas cards for next year

We are in the middle of the holidays and you are having a well earned rest with the family, the last thing on your mind is next years holiday season but it should be. Now with all the Christmas decorations up, family (models) around and big meals you should only be putting your camera down for recharging or down loading photos to the computer.


The weather is pretty and festive, even if it is a bit cold. So now is the time to get out and take as many photos as you can, so that you will have lots of new images for next seasons greeting cards. Now is also a good time to be working on next seasons greeting cards as you are still in the festive mood, get them up loaded and the search engines will have a good nine months to find and index them before the 4th quarter buying frenzy starts.


I know that it can be hard to think about holidays so far in advance but once you get into the habit the rewards are many. Your stress levels will be lower as you will not be in a rush to get your images up loaded and what if there is an issue with copyright or key words, you have nine months to get them fixed.


So record that next program on TV and get your camera out of its box.


Friday, 22 October 2010

Colour in photos

The colour in your images can have a very big effect on how the image is perceived, it can be the simple emotions of feeling warm or cold, or it can be more complex. Not only can colour give the viewer an overall feeling for the image but the colours them self’s can compete within an image ether giving balance to an image or throwing the balance off making the viewer feel uncomfortable.


Some colours dominate more than others for the human mind but it depends on what their surrounding colours are. You can use colours that ether clash or complement each other for different effects within your image, if you look at a colour wheel the colours that are next to each other complement and the colours opposite will clash. Now this does not mean that you should not have them colours in the same image, just that you should be aware of what effect they will have on the mood of the image.


Where the colour appears in your image will effect the composition of the image and also the balance of different colours and how many. Sometimes a colour can compete with the main element of an image lessening the overall effect and sometimes the colours them self’s can be the main element of an image.


Changing the settings on your camera can make a place look totally different than what your eyes see, like using daylight setting indoors under tungsten lighting will give you a warm feel or a yellow / orange cast to the image. the thing is to play with colour till you get the image that you had in your minds eye in the camera, and do not forget to have fun.

Saturday, 2 October 2010

Lead lines

Lead lines are elements in an image that draw the viewers eye into and around the image, the ones that come to mind first are the railway lines that seam to come together towards the horizon or a winding river or path that draws the viewer through the image. although these are lead lines that are seen in some of the more famous paintings and photos that are popular you do not need to use railway lines, paths or rivers but in fact can use almost any line to direct the viewer around your image, even unseen lines.


Many lead lines work on a subconscious level making them hard to compose in camera but with a bit of practice you will soon have the hang of it. The lines are used to guide the viewer into and around your image so you need to be careful that the lines in your image do not lead the viewer out of frame or too the edge of your image. Some lines will go from edge to edge in your image like the horizon but if you had railway lines going to the horizon this would give you a “T” of lead lines that would help to lead the viewer’s eye around the image. This would be more effective if the horizon was 1/3 from the top giving a tall “T” rather than 1/3 from the bottom giving a short “T”.


Having one major lead line in your image can give you a very strong composition but the use of multiple lines can also give you a strong composition without it being so obvious to your viewer, the trick is to make them work together and not compete with each other. Unseen lines as I like to call them is a persons line of sight, so if you have a person with a principal position in your image looking at something in or outside of the image then it will be human nature for people to follow the line of sight to see what they are looking at.


A lot of things can effect how well lead lines work not lest of which is the viewer, if they come from a culture where people read from left to right or from right to left will have an effect on how well the image may work for them. As with all rules for composition once you know them they are but tools for you to use or not to help you create your image and when you understand them feel free to break them.


Next time I will be looking at colour and how you can use it to bring feeling to your images.

Thursday, 12 August 2010

The rule of thirds

To days image idea will look at the rule of thirds, as with many rules, they can be broken but there is a big difference between braking the rules for effect and not knowing them or ignoring them. Now before you get your camera have a look through some magazines and books, news images will have the subject in the centre but if you look at advertising and art images you are more likely to see this rule applied.


Now when looking at an image in your minds eye draw a line down from top to bottom 1/3 in from the left of the image and then again from the right, now repeat drawing the lines across the image 1/3 in form the top and bottom. So now, in your minds eye you have overlaid a grid of four lines, nine boxes and four intersections (where two lines cross) over the image, it is important that you do this with your minds eye as it will help you when composing with your camera.


When you look at an image try to work out which elements you are drawn to first and if your attention keeps jumping from one element to another. Now overlay your minds eye grid, you should find that the elements you are drawn to are very close to or on one of the four lines, if it is a very strong element then it will be close to or on one of the four intersections.


Nest time you use your camera keep in mind the grid when composing your photo and rather than just have your main subject in the centre, try placing it on one of the four lines or intersections. If your subject is a person and they are looking to their left then place them on the left of the photo so that you will follow their gaze into the centre of the photo this will give the photo a felling of space and travel.


The photos in this post all make use of the rule of thirds but that is not the only rule they use and next time I will be telling you about lead lines.